
Resend
Transactional email — password resets, magic links, receipts, and notifications sent from your app.
Why we need this
Resend is the service that sends the transactional email your app relies on: account verification, password resets, magic links, receipts, and other notifications. Calda connects to it two ways — over SMTP and through the Resend API — so the app can send mail reliably from your own domain.
Like all other accounts, this one should be owned by you. Your sending domain reputation and email history are tied to the account, so keeping it under your company means that history and reputation belong to you, not us.
Do I need a credit card?
No. Resend's free tier requires no credit card and is enough to get started and run early beta:
- 3,000 emails per month
- 100 emails per day
- 1 verified sending domain
A paid plan (which does require a card) is only needed later if you outgrow those limits — higher volume, more than one domain, or regional sending.
Heads up before launch
Once we launch the production app, real user traffic will likely push past the free tier's 100 emails/day limit — so you'll probably need to upgrade to a paid plan (which does require a credit card) before going live.
Step-by-step setup
Create the Resend team
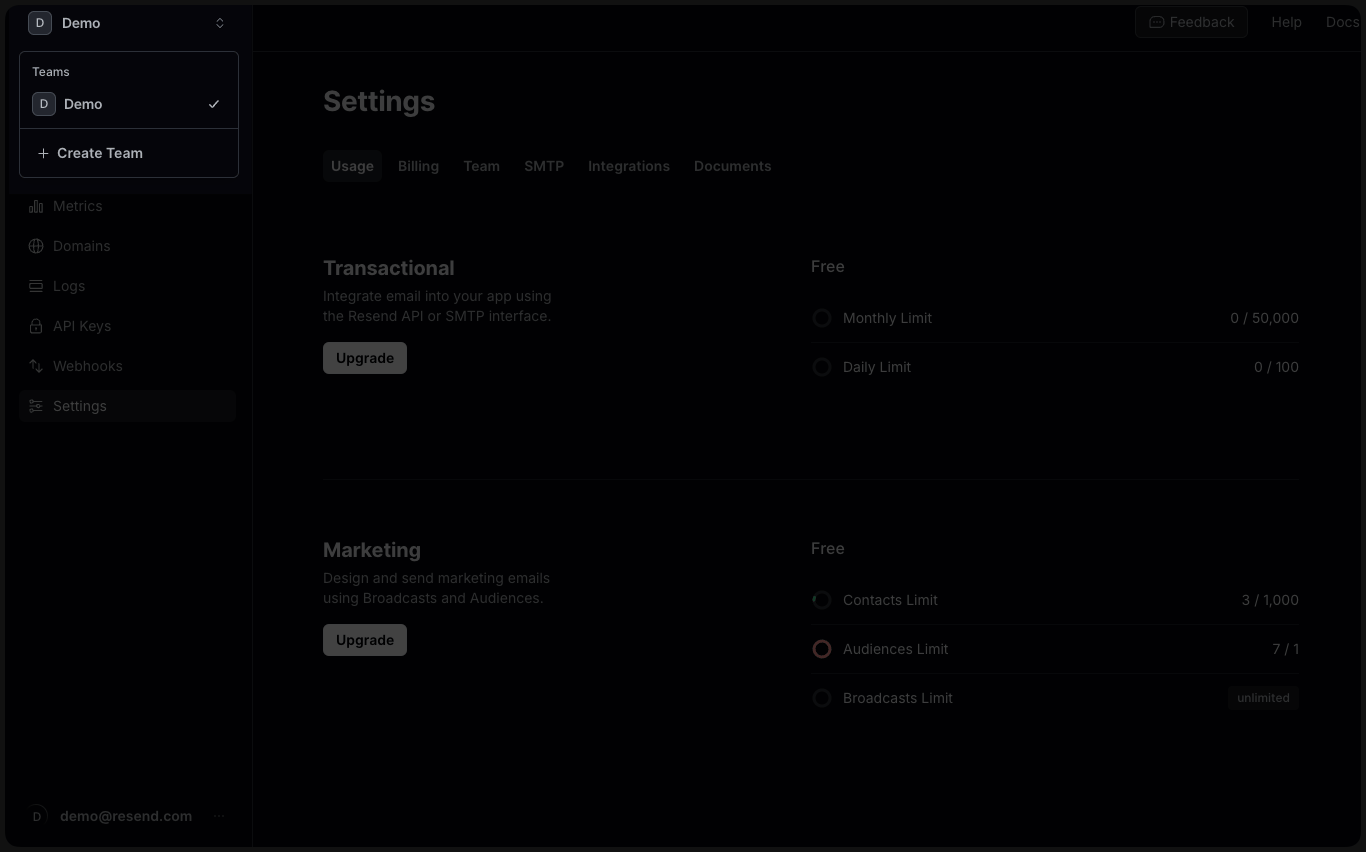
Sign up at resend.com/signup and create a team named after your company. Resend organizes everything — API keys, domains, billing, and usage — under a team, and you can switch between teams from the dropdown in the top-left corner.
Add and verify your sending domain
You'll need access to your domain's DNS settings for this step.
Go to Domains → Add Domain and enter the domain you want to send from. We
recommend using a subdomain like send.yourcompany.com or
updates.yourcompany.com rather than your root domain — this keeps your main
domain's reputation protected. Resend will then show a set of DNS records to add.
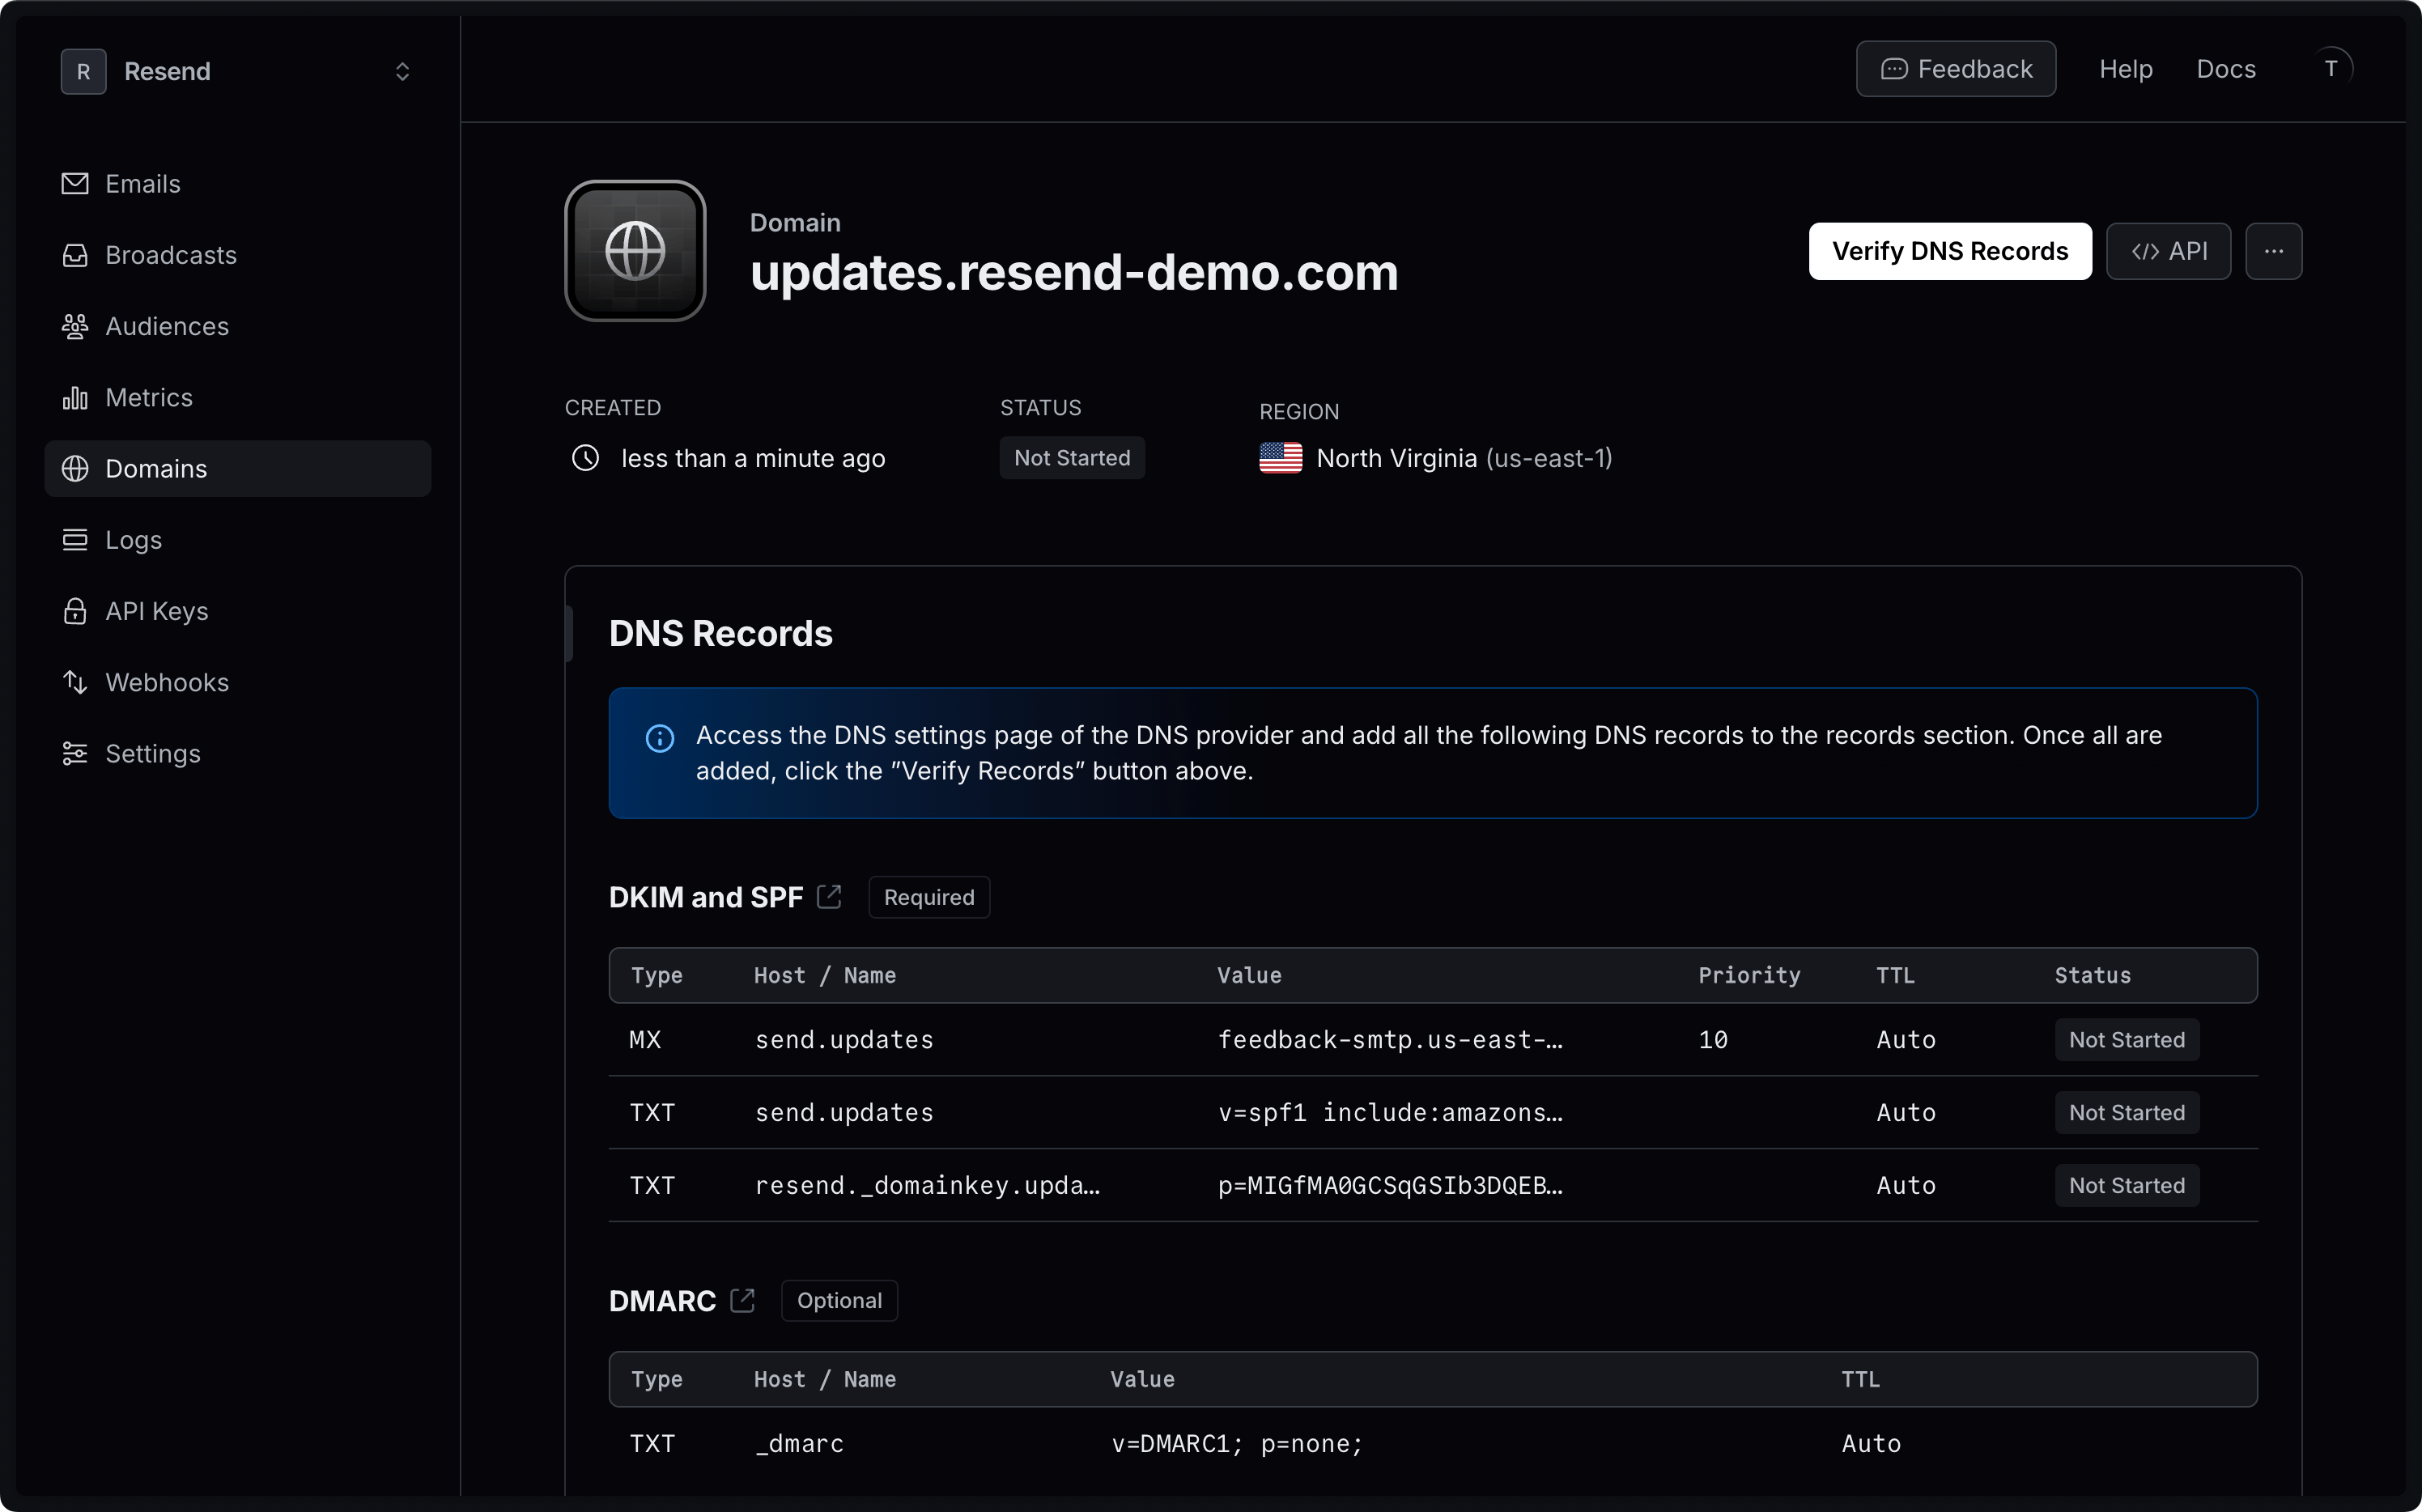
Add the DKIM and SPF records (and the return-path record) at your DNS provider, then click Verify DNS Records. Verification usually completes within a few minutes.
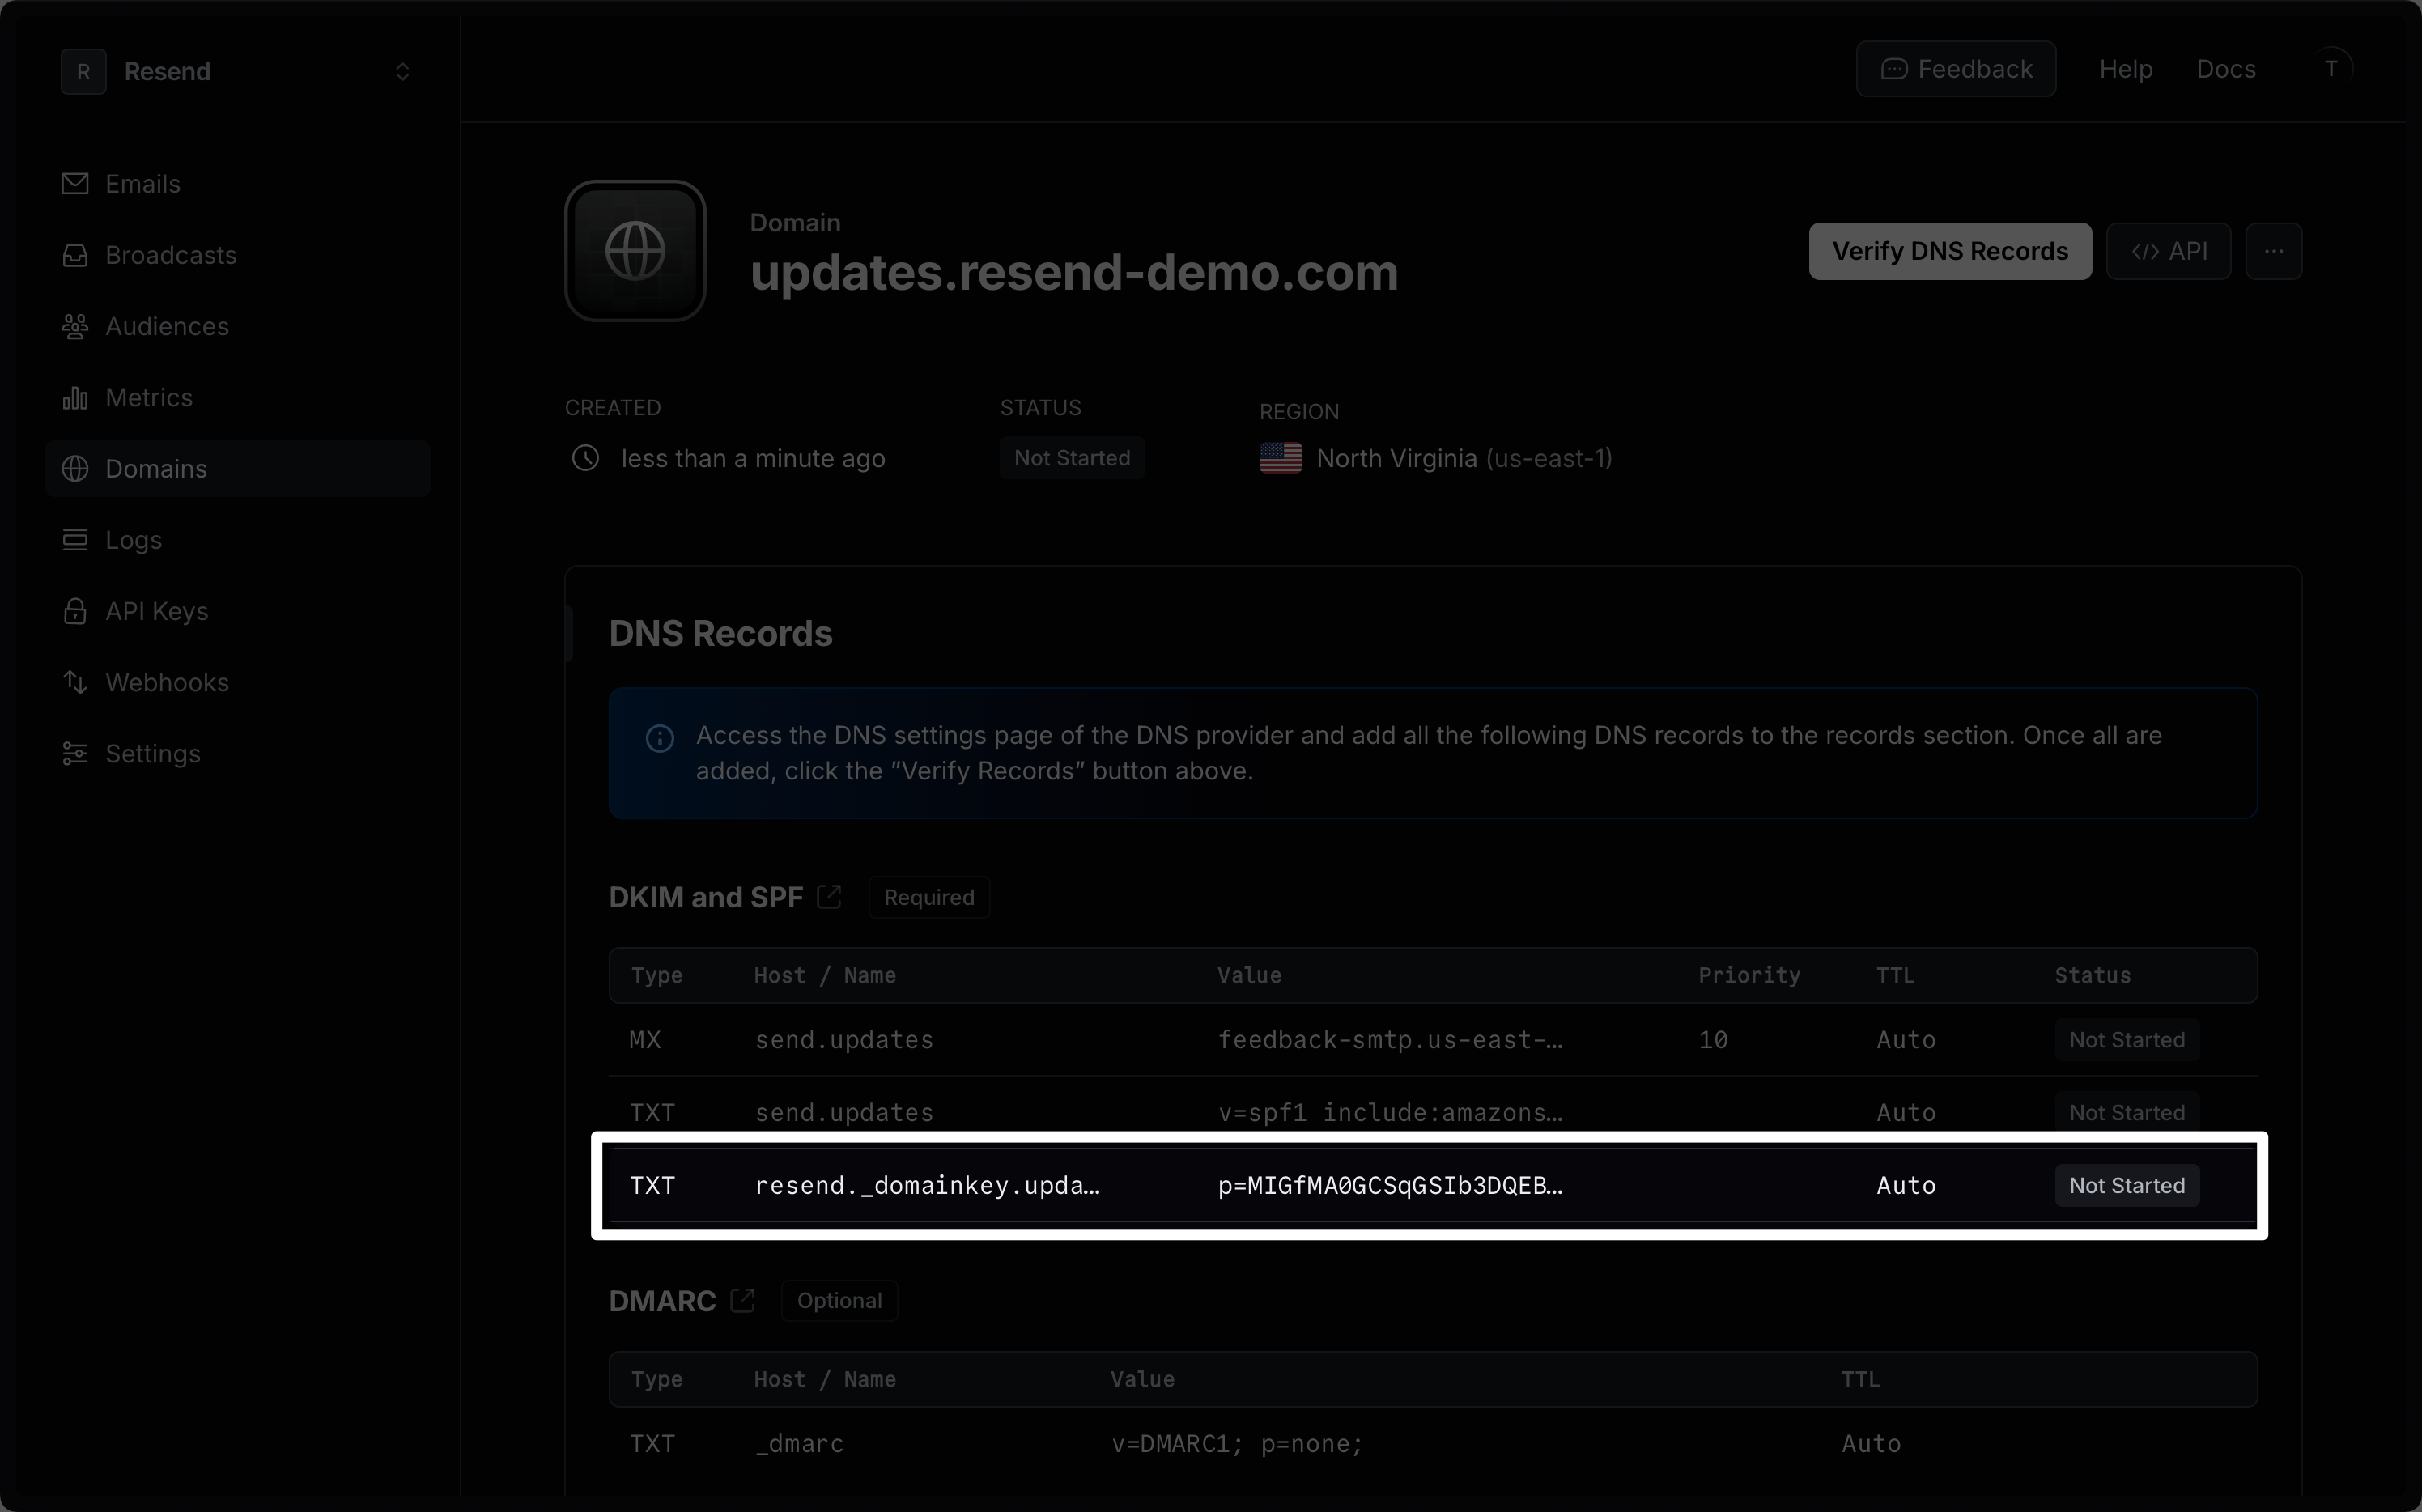
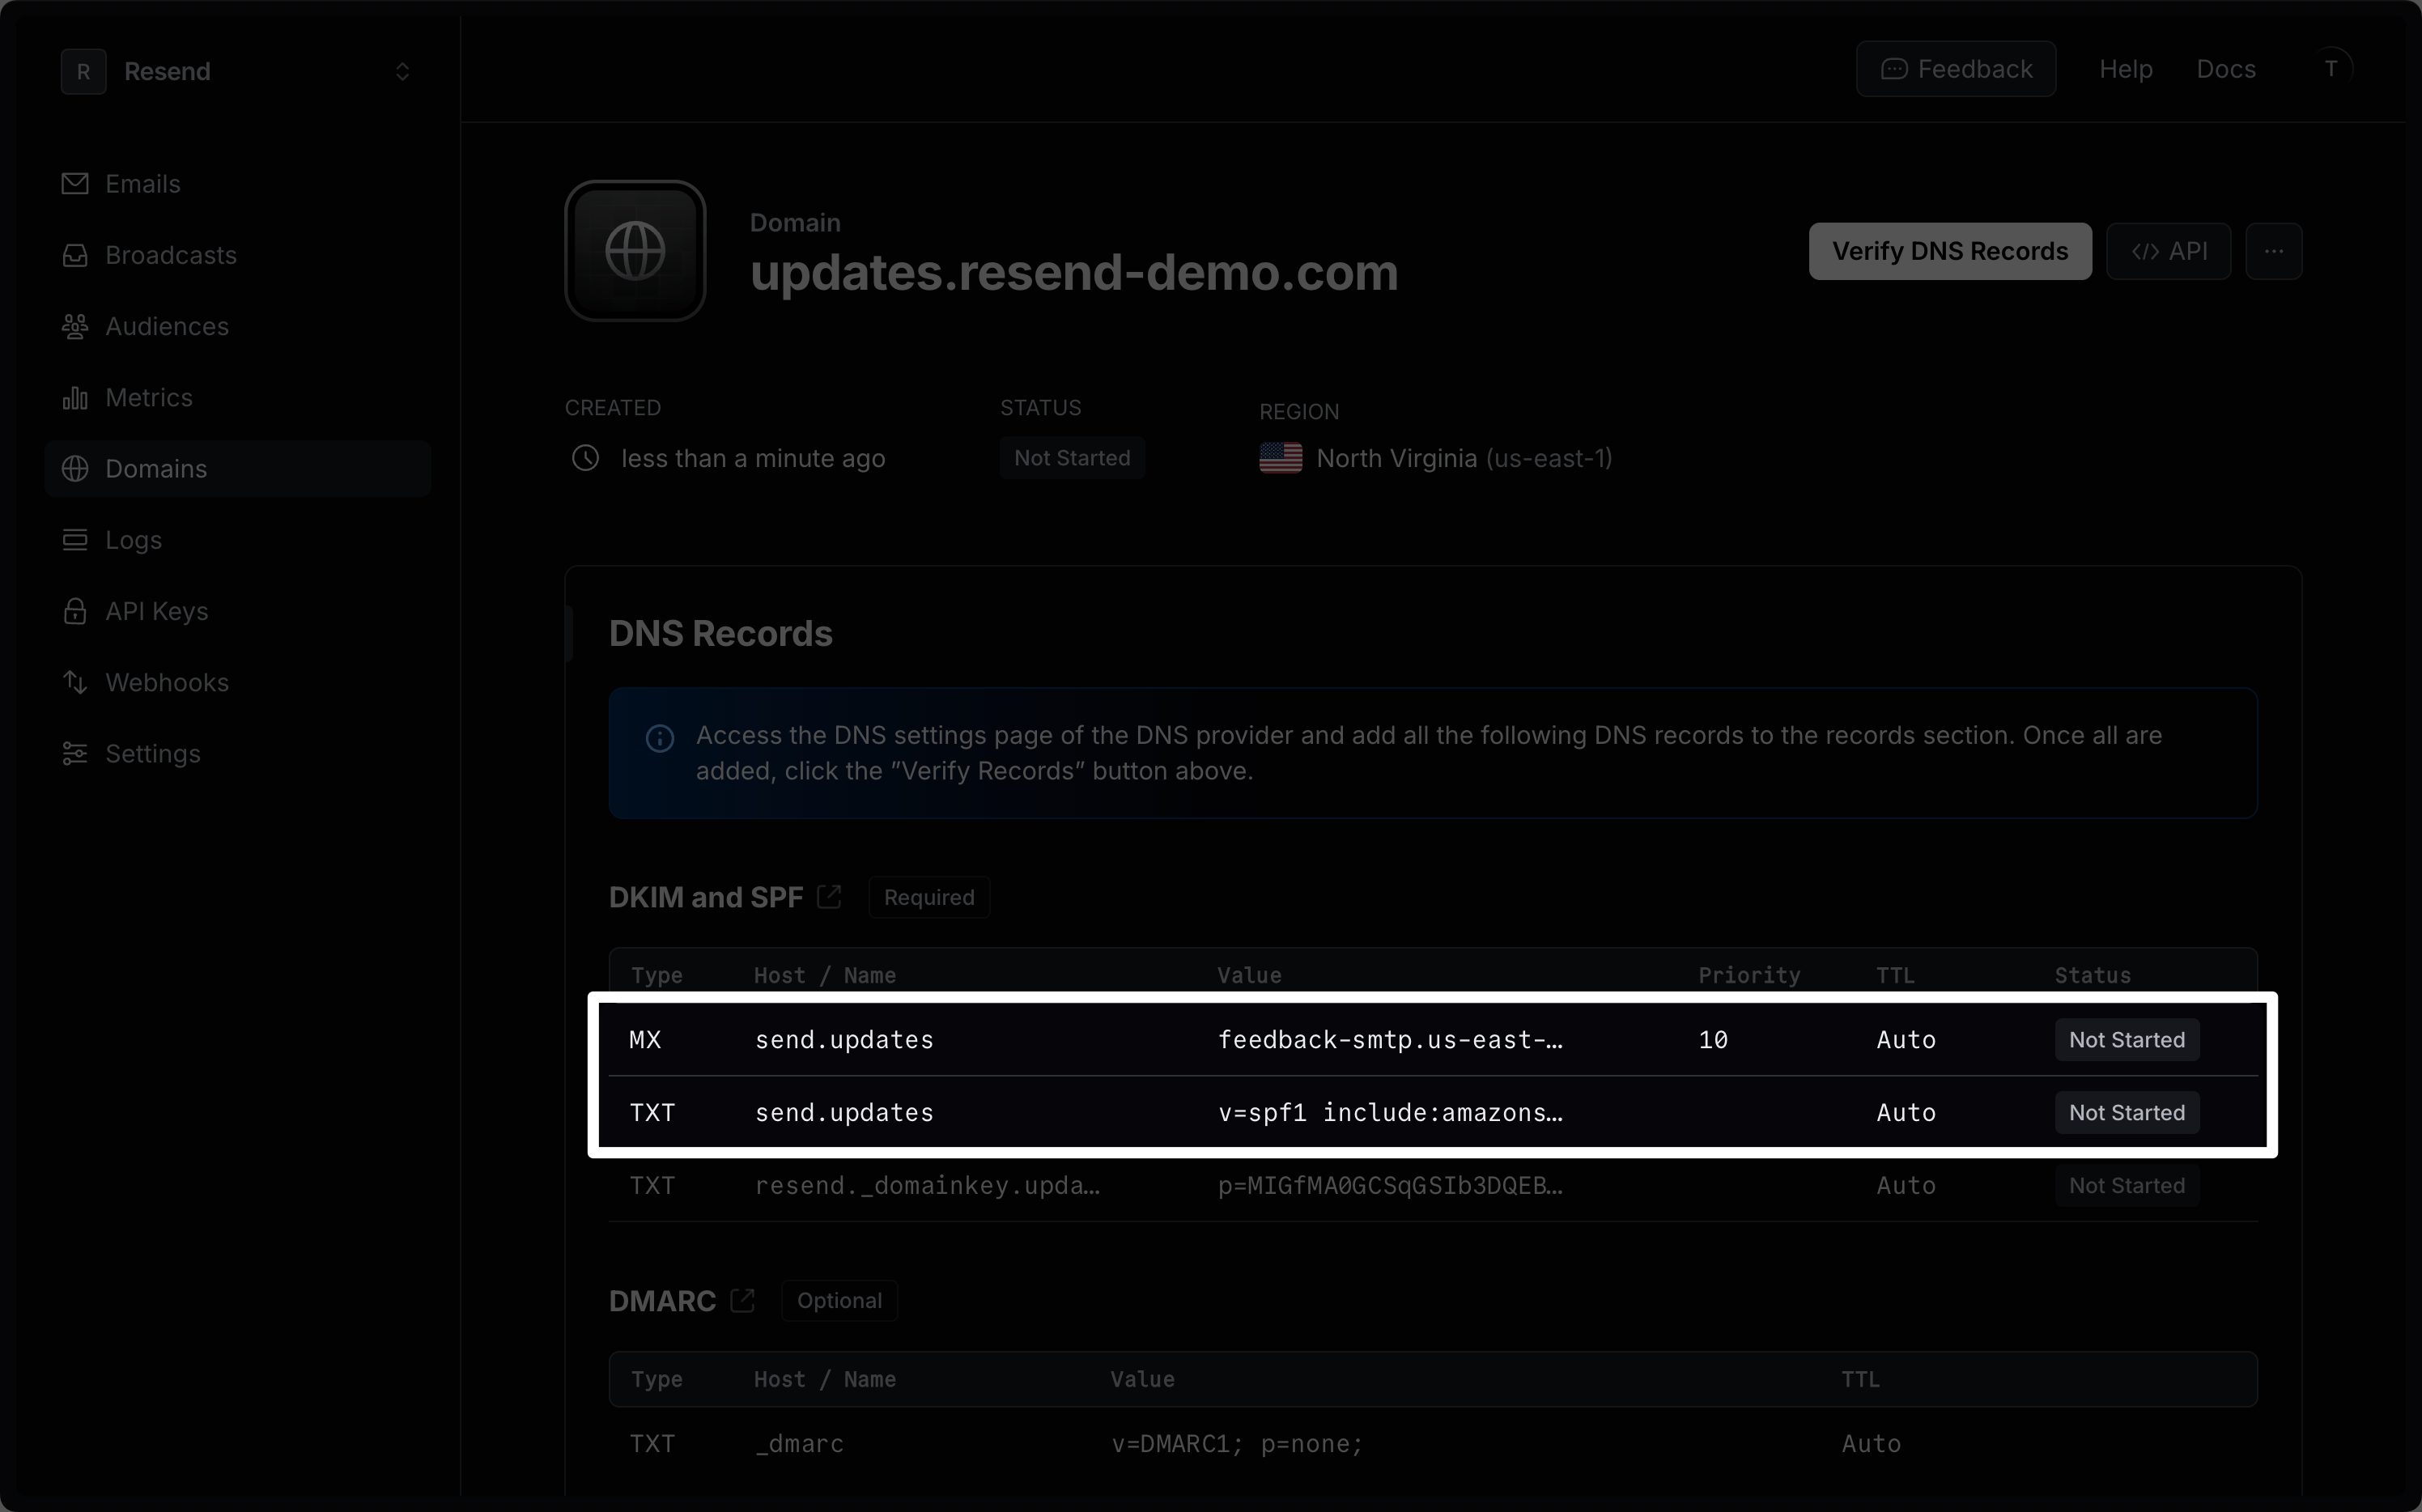
Where to find your DNS records
If you're not sure where your DNS is managed, it should be in the same place as your email or domain hosting provider.
Decide on a from / sender address
Pick the address email should come from on your verified domain — something
like no-reply@yourcompany.com or info@yourcompany.com.
Invite Calda
Open Settings → Team, click Invite, enter the Calda email we share with you, and assign the Admin role. Admin is required — the Member role can't manage API keys, which we need to configure sending.
Confirm in Slack
Don't forget to notify us in Slack so we can accept the invitation and confirm that we can sign in.
Conclusion
That is it — with this configuration we can start sending email from your domain. Once you've granted access and confirmed in Slack, we'll handle the rest of the integration on our side.
How is this guide?