
Expo (EAS)
Cloud builds and store submissions for your mobile app — compile iOS and Android releases, manage signing certificates, and publish without a build machine of your own.
Why we need this
EAS (Expo Application Services) is Expo's cloud build and deployment
platform. Instead of needing a Mac or PC configured with Xcode or Android
Studio to compile and publish your app, EAS handles it all in the cloud — it
builds the installable app files (.ipa for iOS, .apk/.aab for Android),
manages your signing certificates, and submits releases directly to the
App Store and Google Play.
Like all other accounts, this one should be owned by you. Your builds, signing credentials, and billing are tied to the account, so keeping it under your company means your release process belongs to you, not us.
Do I need a credit card?
Not to get started. Creating an account, creating an organization, and inviting us are all free, and the free tier includes a limited number of cloud builds per month.
A paid plan may be needed closer to launch
Free-tier builds sit in a shared queue and are capped per month. Once we're building releases regularly you'll likely want a paid plan for faster builds and a higher limit — we'll flag it before it becomes a blocker.
Step-by-step setup
Create your Expo account
Go to expo.dev/signup and fill in your name, company email, and a password. A Personal account is created automatically.
Verify your email before continuing — some of the steps below won't work until you do.
Signing up with SSO
You can also sign up with SSO (Google or GitHub). Either works — just make sure the account is one your company controls, since it owns the organization we create in the next step.
Create an organization
Your app should live in an organization, not your personal account, so access and billing sit under your company.
Click your username in the top navigation to open the dropdown, and under Organizations select Create Organization. Enter a name — usually your company or app name — and click Create. The slug fills in automatically, and the avatar is optional.
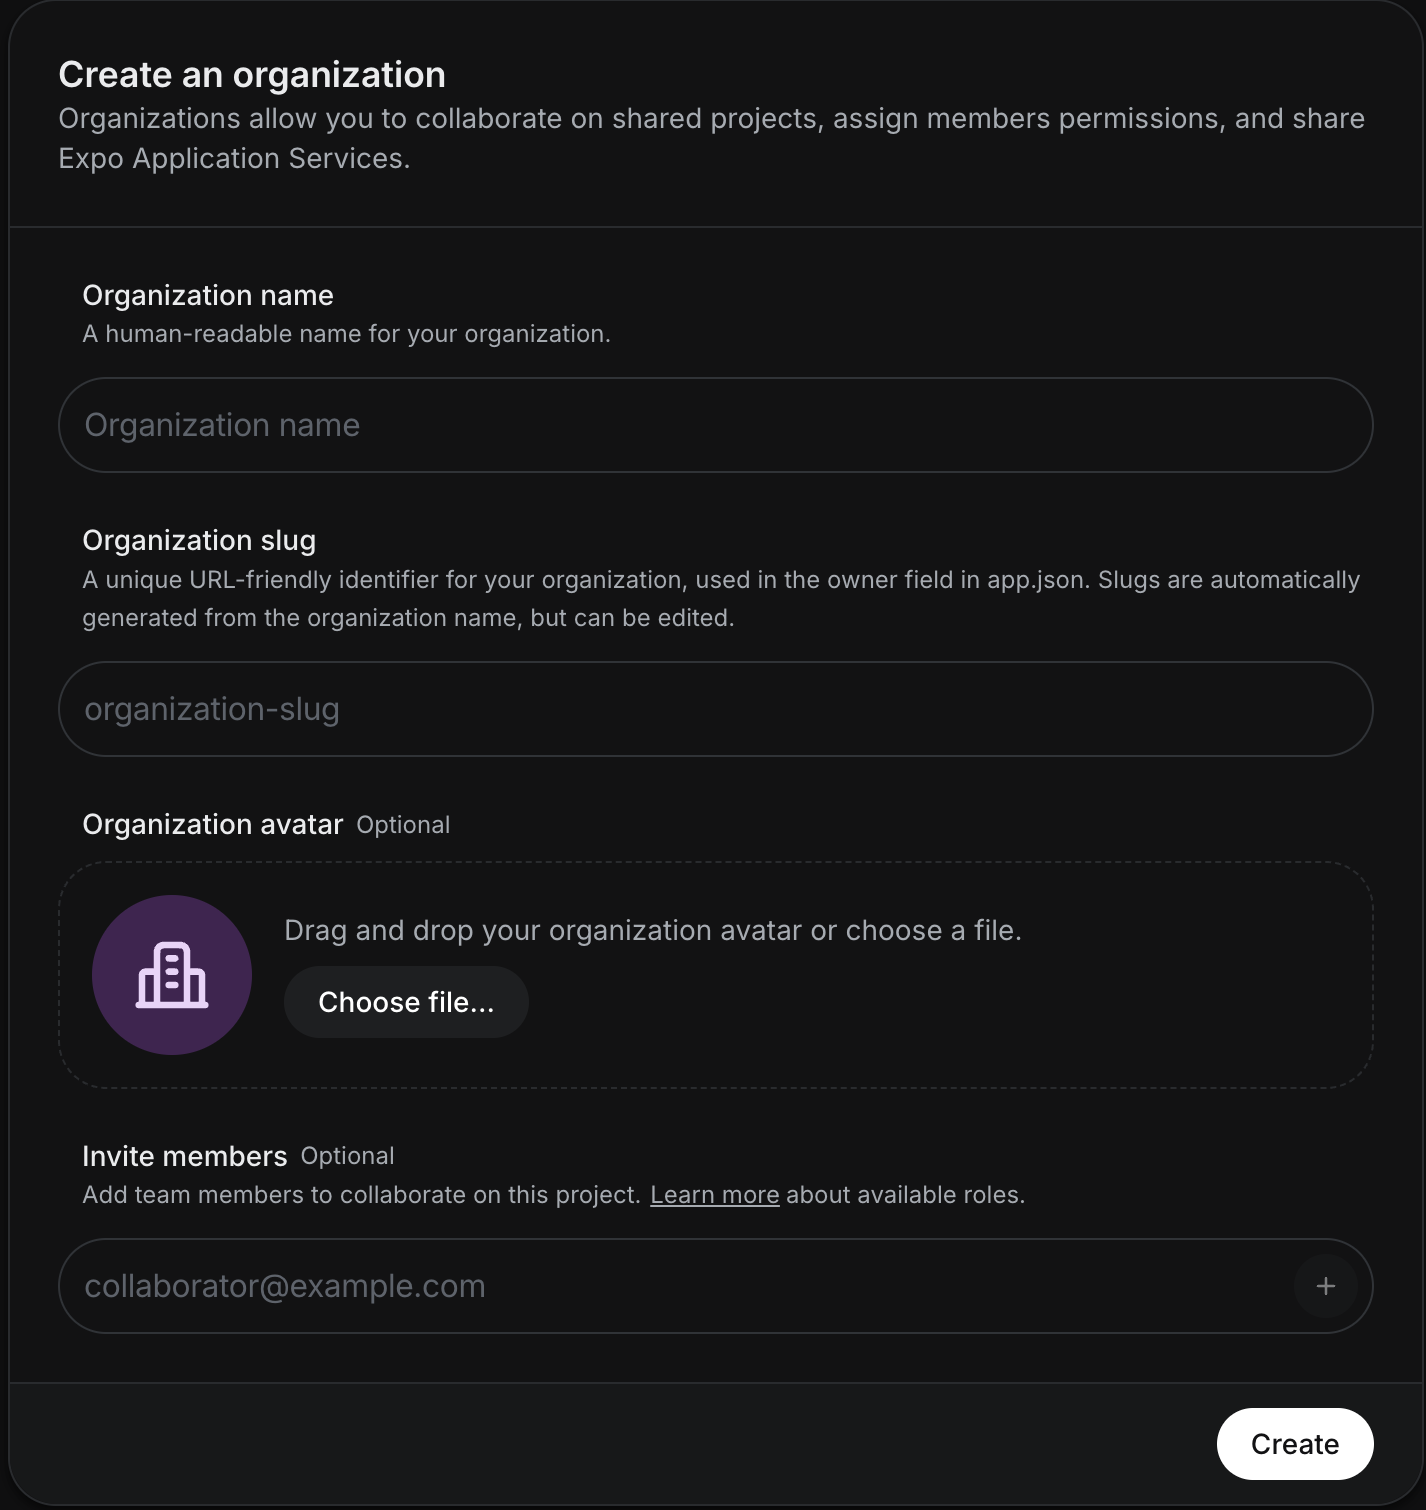
You'll be redirected to the new organization's dashboard. This is where your app will live.
Skip the invite members field for now
This form has an optional Invite members field, but it doesn't let you choose a role. Skip it and invite us in the next step instead, so we get the right access level.
Invite Calda
From the organization dashboard, go to Settings → Members and click Invite. Enter the Calda email we share with you.
Under Role, choose Admin so we can manage builds, credentials, and project settings. Admins can't delete the organization, so ownership stays with you.
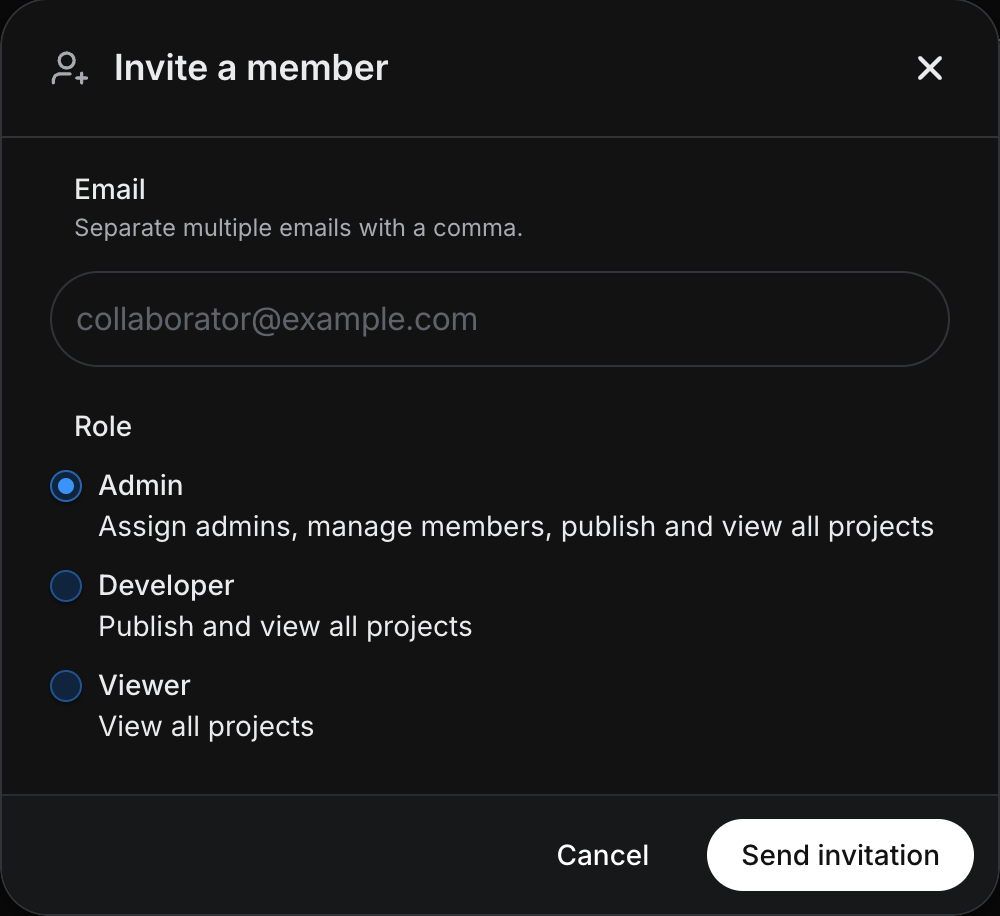
Click Send invitation.
Confirm in Slack
Don't forget to notify us in Slack so we can accept the invitation and confirm that we can sign in.
Conclusion
That is it — with this access we can configure the build profiles, signing credentials, and store submissions on your own Expo organization. Once you've invited us and confirmed in Slack, we'll handle the rest on our side.
How is this guide?